Introduction
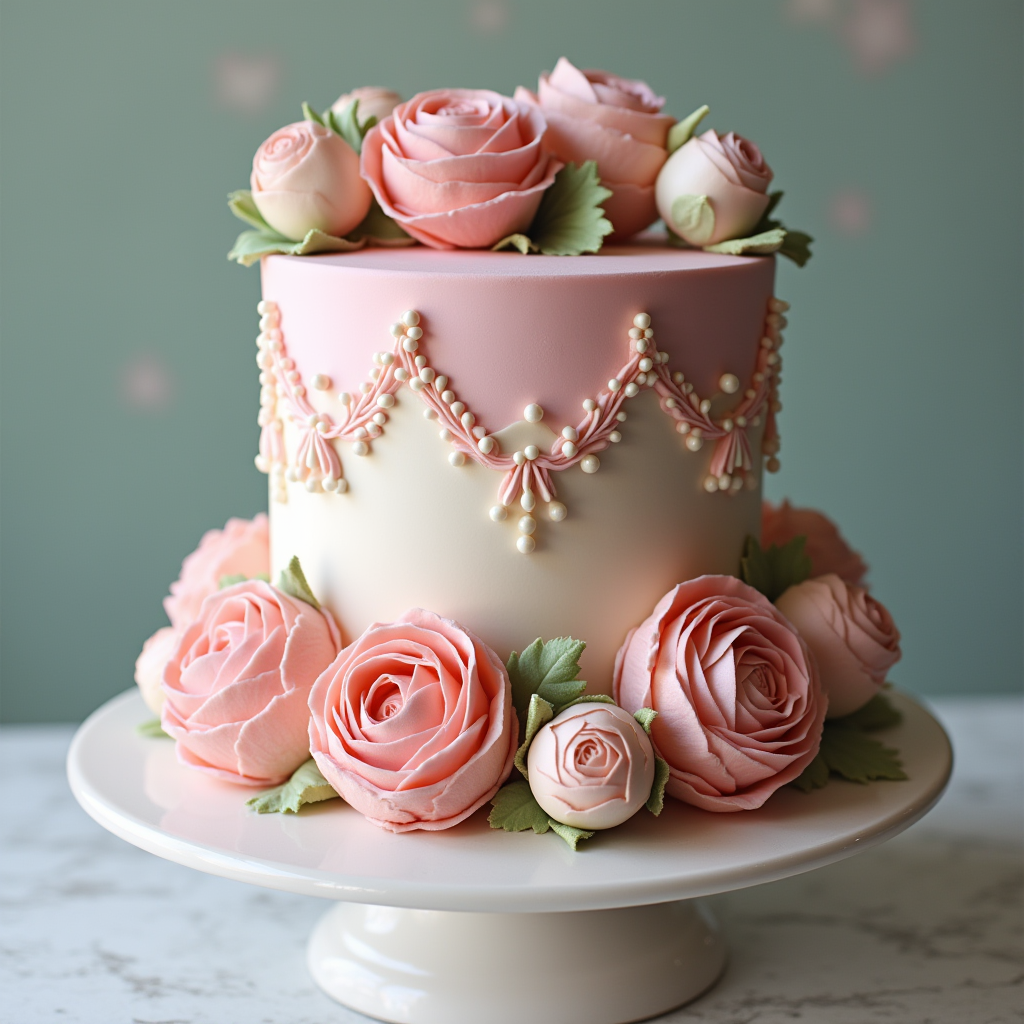
There’s something undeniably magical about a Vintage Cake. Imagine a dessert that’s not just delicious but also a feast for the eyes—soft pastel colors, delicate lace patterns, and elegant floral accents that transport you to a bygone era. Whether it’s a wedding, birthday, or a simple afternoon tea, a Vintage Cake is the perfect way to add a touch of nostalgia and sophistication to any occasion.
But here’s the best part: creating a Vintage Cake is easier than you think! With a few simple tools and techniques, you can design a show-stopping dessert that will leave your guests in awe. Think of it as a blend of baking and artistry, where every swirl of frosting and every edible pearl tells a story.
If you loved our guide to classic buttercream cakes, you’ll adore this Vintage Cake tutorial. It’s family-friendly, fun to make, and perfect for bakers of all skill levels. So, roll up your sleeves, grab your piping bag, and let’s create something truly special together!
Table of Contents
What is Vintage Cake?
Ever wondered why it’s called a Vintage Cake? Is it because it looks like it belongs in a retro cookbook or because it tastes like a slice of nostalgia? Well, it’s a bit of both! The term “vintage” refers to the timeless, elegant designs that were popular in the mid-20th century—think lace patterns, soft pastels, and intricate floral details.
There’s a saying that “the way to a person’s heart is through their stomach,” and a Vintage Cake is the perfect way to win hearts. It’s not just a cake; it’s a masterpiece that combines flavor and artistry. So, why not give it a try? Whether you’re baking for a special occasion or just because, this Vintage Cake recipe is sure to impress. Ready to get started? Let’s dive in!
Why You’ll Love This Vintage Cake
- Timeless Elegance: A Vintage. Cake is more than just a dessert—it’s a work of art. The intricate designs and soft colors make it perfect for weddings, anniversaries, or any celebration where you want to add a touch of sophistication.
- Cost-Saving: Why spend hundreds on a custom cake when you can create your own at home? With a few basic tools and ingredients, you can design a stunning Vintage. Cake that looks like it came from a professional bakery.
- Flavorful and Versatile: From classic vanilla to rich chocolate, the flavor options are endless. Plus, you can customize the decorations to match any theme or color scheme.
If you enjoyed our guide to decorating a classic layer cake, you’ll love this Vintage Cake tutorial. It’s a fun and creative way to elevate your baking skills. So, what are you waiting for? Let’s bake something beautiful!
How to Make Vintage Cake
Quick Overview
This Vintage Cake recipe is all about simplicity and creativity. With a moist cake base, smooth frosting, and stunning retro decorations, it’s a dessert that’s as fun to make as it is to eat. The best part? You don’t need to be a professional baker to create something truly special.
Preparation Time: 30 minutes
Decorating Time: 1 hour
Total Time: 1 hour 30 minutes
Key Ingredients for Vintage Cake
Here’s what you’ll need to create your masterpiece:
- For the Cake:
- 2 ½ cups all-purpose flour
- 2 ½ tsp baking powder
- ½ tsp salt
- 1 cup unsalted butter (softened)
- 2 cups granulated sugar
- 4 large eggs
- 1 tsp vanilla extract
- 1 cup whole milk
- For the Frosting:
- 3 cups powdered sugar
- 1 cup unsalted butter (softened)
- 2-3 tbsp heavy cream
- 1 tsp vanilla extract
- For Decorations:
- Fondant (white or pastel colors)
- Edible pearls or gold leaf
- Food coloring (pastel shades)
- Piping bags and tips
Step-by-Step Instructions
- Prepare the Cake:
- Preheat your oven to 350°F (175°C) and grease two 9-inch cake pans.
- In a bowl, whisk together flour, baking powder, and salt.
- In a separate bowl, cream the butter and sugar until light and fluffy. Add eggs one at a time, then mix in vanilla extract.
- Gradually add the dry ingredients and milk, alternating between the two. Mix until smooth.
- Divide the batter evenly between the pans and bake for 25-30 minutes. Let the cakes cool completely.
- Make the Frosting:
- Beat the butter until creamy, then gradually add powdered sugar.
- Mix in vanilla extract and heavy cream until the frosting is smooth and spreadable.
- Assemble and Decorate:
- Level the cake layers and spread a thin layer of frosting between them.
- Cover the cake with a crumb coat, then chill for 15 minutes.
- Roll out fondant and drape it over the cake for a smooth finish.
- Use piping bags, stencils, and edible pearls to add vintage designs.
What to Serve Vintage Cake With
Pair your Vintage .Cake with:
- A cup of Earl Grey tea for a classic afternoon tea vibe.
- Fresh berries and whipped cream for a light and refreshing contrast.
- A glass of sparkling wine for a celebratory touch.
Top Tips for Perfecting Vintage Cake
- Use gel food coloring for vibrant pastel shades.
- Chill the cake before applying fondant to prevent wrinkles.
- Practice piping designs on parchment paper before decorating the cake.
Storing and Reheating Tips
- Store the cake in an airtight container at room temperature for up to 2 days or in the fridge for up to 5 days.
- To freeze, wrap the cake tightly in plastic wrap and store for up to 2 months. Thaw in the fridge before serving.
Conclusion
Creating a Vintage Cake is a delightful way to combine baking and artistry. With its timeless elegance and customizable designs, it’s perfect for any occasion. So, grab your tools, unleash your creativity, and bake a Vintage .Cake that’s as beautiful as it is delicious. Don’t forget to share your creations with us—we can’t wait to see what you come up with!


